Contents
the email tool that makes email marketing simple


Email Campaigns
Published: May 18, 2025
Email Campaign Overview
On the overview page you can view all your email campaigns.
In the first column you can see the current status of the email campaign - for example, draft, scheduled or sent. This is followed by the email subject of the campaign, the date it was (or will be) sent and the number of recipients, if this information is already available.
For campaigns that have already been sent, this is followed by the most important email marketing metrics - Delivery Rate, Open Rate and Click Rate, as far as these are known. On the far right, as usual with Maildroppa, there are three dots that allow you to perform different actions on the respective campaign, depending on its status.
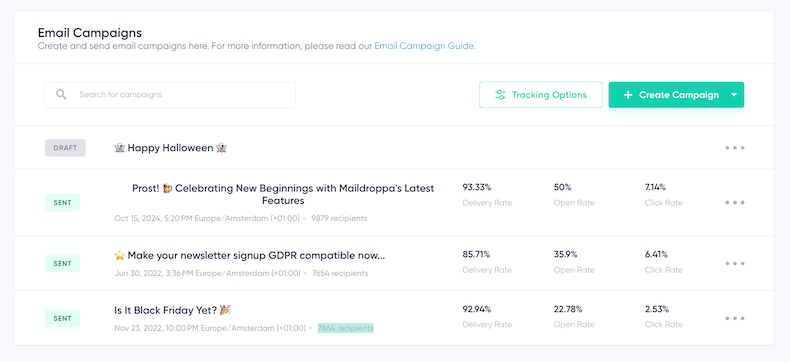
Drafts can be viewed or deleted. Scheduled campaigns can be unscheduled, scheduled for a new date, or used as a new draft. For sent campaigns, you have the option to view them, copy them to a new draft, or view the dispatch report with all email marketing metrics.
You can view a maximum of 10 different newsletter campaigns per page. If you have more than 10 campaigns, you can access other pages below the overview list via the navigation bar.
There is a search box on the left above the newsletter campaigns overview list. This allows you to run a free text search across all campaign email subject lines. On the right side, there is a "Tracking Options" button and a “Create Campaign” button.
When you click on the Tracking Options button, a popup will appear.
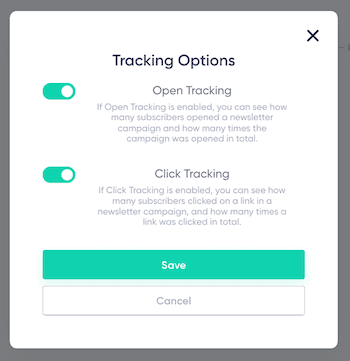
In the pop-up you can set whether you want to use open or click tracking for your newsletter campaigns or none at all.
Tracking Options
If the privacy of your customers is important to you, or if you want to increase the open rate of your newsletter campaigns, you have the option to disable open and click tracking of your newsletter campaigns here.
Please note that when sending a newsletter campaign, the currently selected tracking setting always applies. Depending on the current setting, we will then include open tracking pixels and tracking urls in your email, or not. This setting can't be changed after the mail has been sent.
Last but not least, please note - disabling tracking has consequences. If you have deactivated Open Tracking, you will not get any information in the newsletter overview or in the newsletter report regarding how often your campaign was opened. If you disable click tracking, you will not see how many times the links in a campaign were clicked.
Furthermore, you will not be able to use link tagging and you will not be able to adjust the link target after the campaign has been sent, if you have made a typing error.
Open Tracking
If you have Open Tracking enabled, we add a hidden one pixel image at the beginning and end of each email. When the email is loaded, these pixels are usually also loaded, and so we can determine who has opened your emails and who has not.
However, more and more email clients are now suppressing the loading of such tracking pixels in order to better protect the privacy of your users.
Even though we do everything humanly possible to ensure that your emails all reach your subscribers, by enabling tracking you increase the likelihood that your email will be caught by spam filters.
Click Tracking
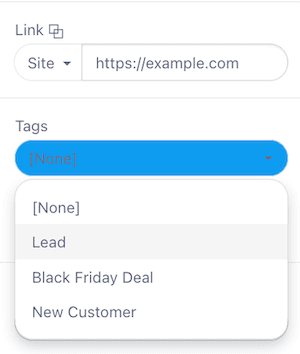
To determine how often the links in a newsletter campaign email are clicked, we use special tracking urls. We also use the same method to tag a subscriber when they click on a link, or to subsequently adjust the target of a link in case of a typo.
As mentioned at the beginning, you aren't able to use link tagging or adjust the target of a link afterwards if you deactivate click tracking.
Fixing Broken Links After Sending a Campaign
Sending a newsletter campaign to thousands of subscribers, only to discover a broken link afterward, can be frustrating. However, Maildroppa provides a convenient way to correct these errors—even after the email has already reached inboxes.
How to Fix a Broken Link:
-
Locate the Sent Campaign
From your campaign overview, click the three dots (•••) next to the sent campaign and choose View Campaign. -
Update the Link
Scroll down to the list of links included in your campaign. Here you can directly edit any incorrect or outdated URLs. Your changes take effect immediately for anyone clicking the link from now on.
Important: To use this feature, ensure that Click Tracking is enabled in your campaign's Tracking Options before sending. Without Click Tracking, Maildroppa cannot correct the links after sending.
This allows you to maintain professionalism and avoid sending awkward correction emails—keeping your subscribers happy and your brand credible.
Email Report
If you click on the 3 dots on the far right of an already sent campaign in the newsletter campaign and then on "View Report", you can see a detailed report of the email campaign.
However, you should keep in mind that this report is generated in real time, and that the sending of all emails is staggered over several days, if necessary, in order to achieve the highest possible delivery rate for you. This means that in the first few hours, the delivery rate will be low, but will increase over time.
Create Campaign Button
To create a newsletter campaign, click the “Create Campaign” button.
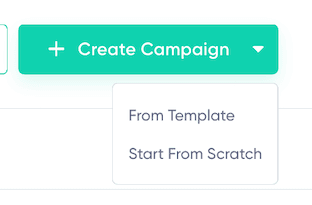
Here you can choose whether you want to create the email from scratch, or with an Email Template as a starting point.
If you selected "From Template" you will see the template library with all your custom templates as well as our system templates to choose from, otherwise you will directly see the Create Email Campaign page.
Create Email Campaign Page
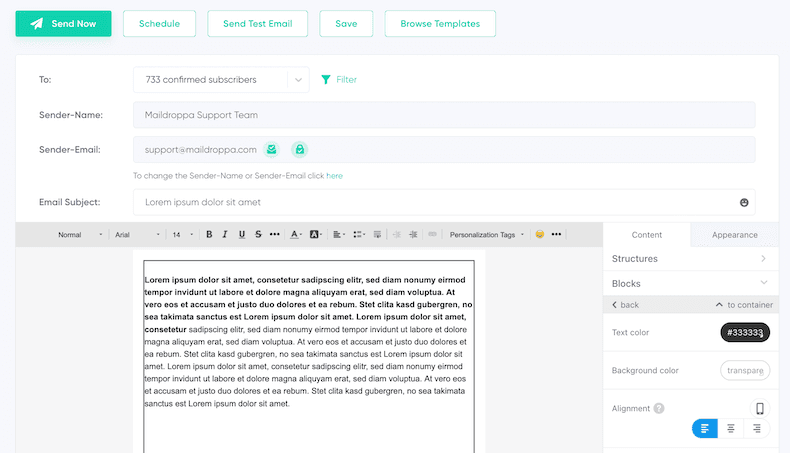
On this page you can create an email with subject and body text. If you want to send the email immediately, click on "Send Now".
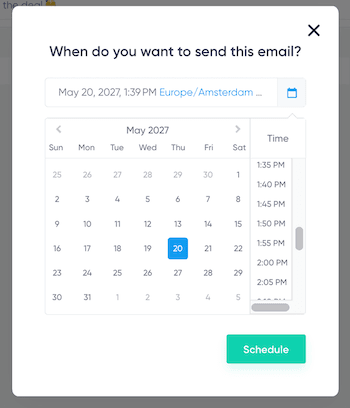
Schedule an Email Campaign
If you want to send the email at a specific time in the future, click the small white triangle next to "Send Now" and then click "Schedule Send".
In the popup that appears, you can select a time in the future when you want the email campaign to be sent to your subscribers.
Please note that the assignment of which subscribers the email will specifically be sent to is always done at the actual send time - that is, subscribers who have unsubscribed from your newsletter in the meantime will not receive this scheduled newsletter, and subscribers who have newly subscribed or resubscribed before sending will also receive the newsletter.
You should ensure that your current subscriber plan is suitable to send the required number of emails in the future.
Send Test Email Campaign
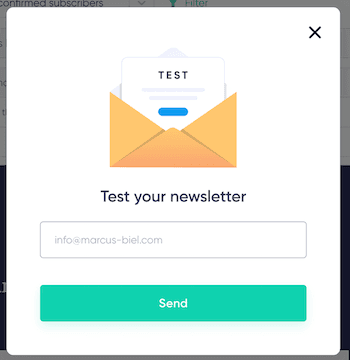
Alternatively, you can send a single test email. This is highly recommended to make sure that the email campaign is displayed correctly and all the links it contains are working.
Save Email Campaign Draft
Last but not least, you can also save an email campaign as a draft for later.

Email Composition Header
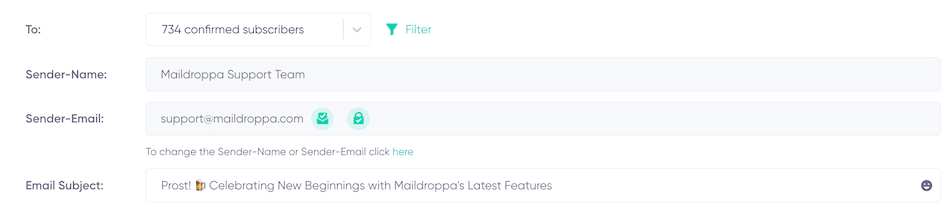
The Email Composition Header provides a summary of key settings for your email campaign. It ensures that all critical details about your campaign are displayed upfront before sending. Here’s what each field represents:
1. To Field
This dropdown allows you to specify the target audience for your email campaign:
- Select from predefined segments or subscriber groups, such as "High-Value Customers" or "All Confirmed Subscribers."
- In the "To" field, you can restrict your campaign to specific segments, such as "High Value Customers" or subscribers of a particular tag.

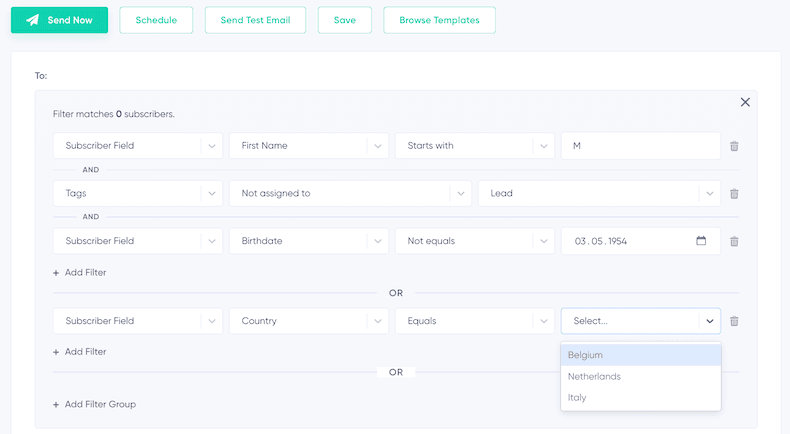
2. Filter Option
Alternatively, you can filter your subscribers via an individually created filter. To do this:
- Click on "Filter" next to the "To" field.
- In the filter mask that appears, create a custom filter. This works similarly to creating a permanent segment and allows you to define dynamic criteria for selecting subscribers, such as activity status, location, or other attributes.
- The filter is executed "just in time" when you click send. It will only be stored for scheduled email campaigns.
3. Sender Name and Sender Email
These fields define the sender information displayed to recipients:
- Sender Name: The name displayed as the sender of the email. By default, this is set to "Maildroppa Support Team." However, you can customize it to align with your brand.
- Sender Email: This is the email address from which the campaign is sent.
- By default, emails are sent from a noreply@maildroppa.com address if the customer has not verified their custom domain or set up a sender email address.
- If a custom domain is verified and a sender email is added, campaigns can be sent from this custom address for better branding and higher delivery rates.
You also get a preview of how your email will appear to recipients via the “Sender-Name," "Sender-Email," and "Reply-To-Email" lines.
For best results, we recommend setting up your own email address for sending newsletter campaigns with Maildroppa.
4. Email Subject Line

- Text Input: Enter the subject line that will grab the attention of your recipients. Craft concise, engaging subject lines to increase open rates.
- Emoji Selector: On the far right of the subject line field is a grey smiley face icon. Clicking this opens a popup with an emoji library, allowing you to add emojis to your subject line for extra personalization and engagement.
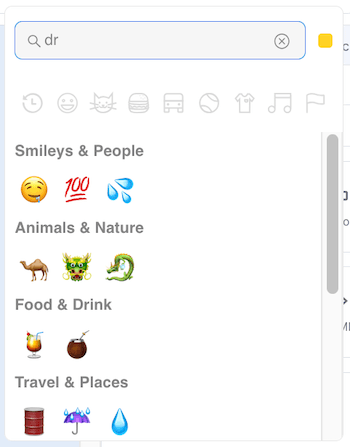
Adding emojis can make your email stand out in crowded inboxes, but use them sparingly and ensure they align with your campaign's tone and message.
Creating Email Content
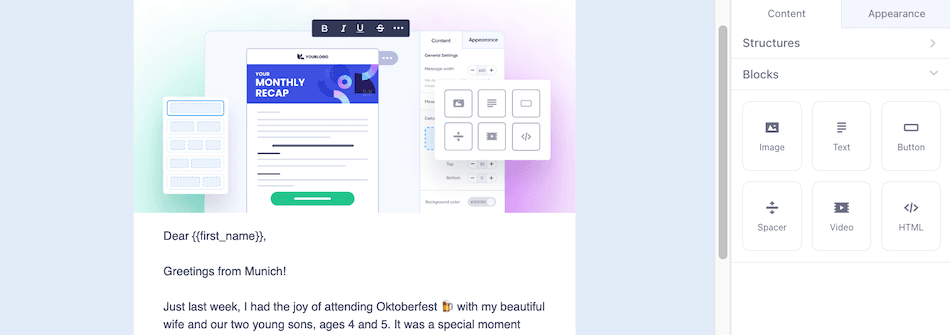
At the heart of the Create Campaign Page is the powerful drag-and-drop email editor, powered by Stripo. This editor is designed to simplify the process of building visually appealing and professional email campaigns, even if you're not a design expert. With its intuitive interface, you can easily add and arrange elements like text blocks, images, buttons, and more to craft the perfect email for your audience.
Since the drag-and-drop editor offers a wide range of advanced customization options, we've dedicated a separate article to explore its features in detail. From designing responsive layouts to incorporating interactive elements, the possibilities are extensive.
Learn more about using the Drag-and-Drop Editor here.