Chapters
- Signup Form Builder: Design Forms
- Build and Publish Landing Pages
- Build and Embed Signup Forms
- Create and Display Popup Forms
- Create and Position Slide-in Forms
Contents
the email tool that makes email marketing simple


Build and Embed Signup Forms
Published: · Last updated: · By Marcus Biel
In brief
Learn how to design a Maildroppa Embedded Form, save and activate it, copy the JavaScript or HTML code, place it on your website, and test the signup.
An Embedded Form is placed directly inside an existing page on your website. It remains part of the surrounding content instead of appearing above it.
Embedded Forms work well in blog articles, landing pages on your own website, newsletter sections, sidebars, and footers. The location where you add the form code determines where the form appears.
This guide covers the steps that are unique to Embedded Forms. The common visual editing functions are explained in the main Signup Form Builder guide.
Creating an Embedded Form
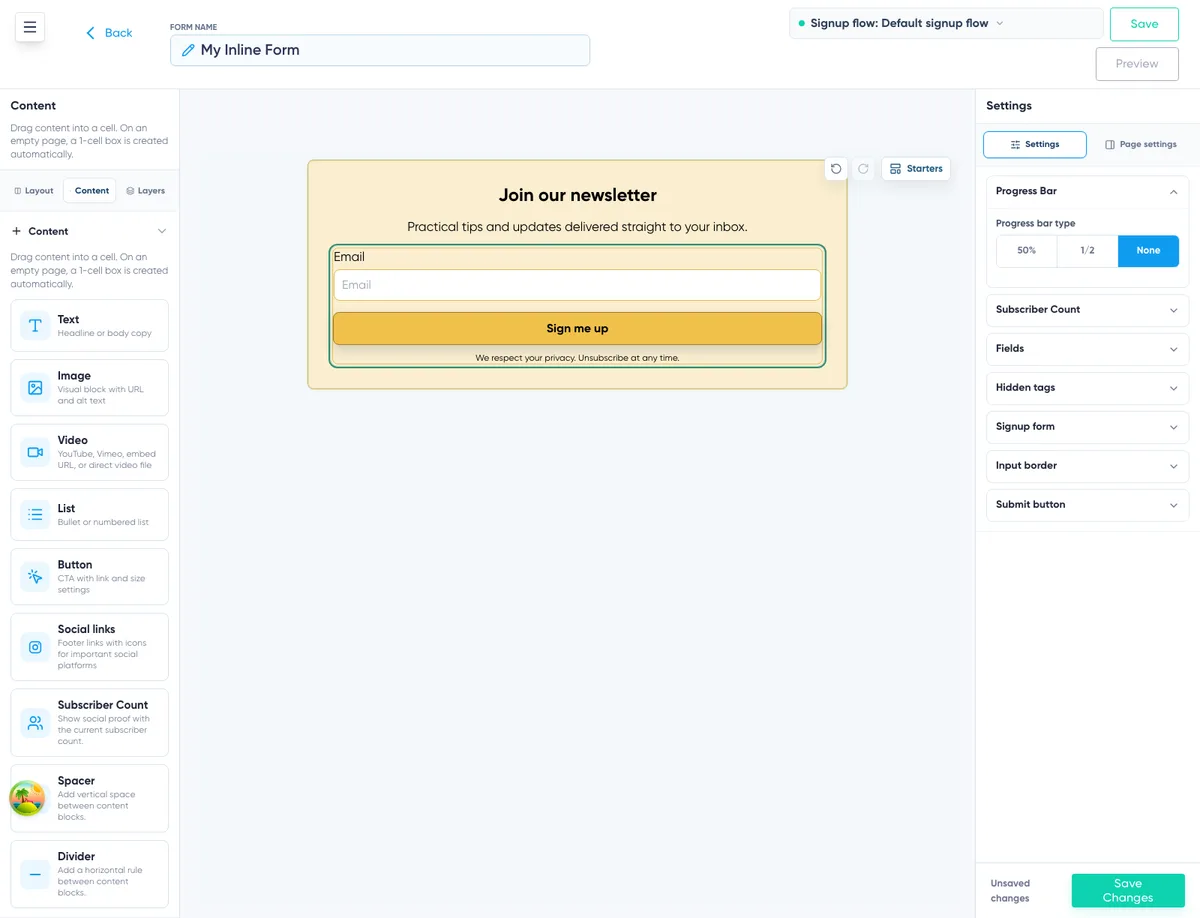
Open “Signup Forms”, click “Create Form”, and select “Embedded Form”. Enter a clear internal name and continue to the builder.
You can also edit an existing form by clicking its name in the Signup Forms Overview.
The internal name is not automatically displayed to visitors. Name the form after its location or purpose, for example “Homepage Newsletter”, “Blog Footer”, or “Product Updates”.
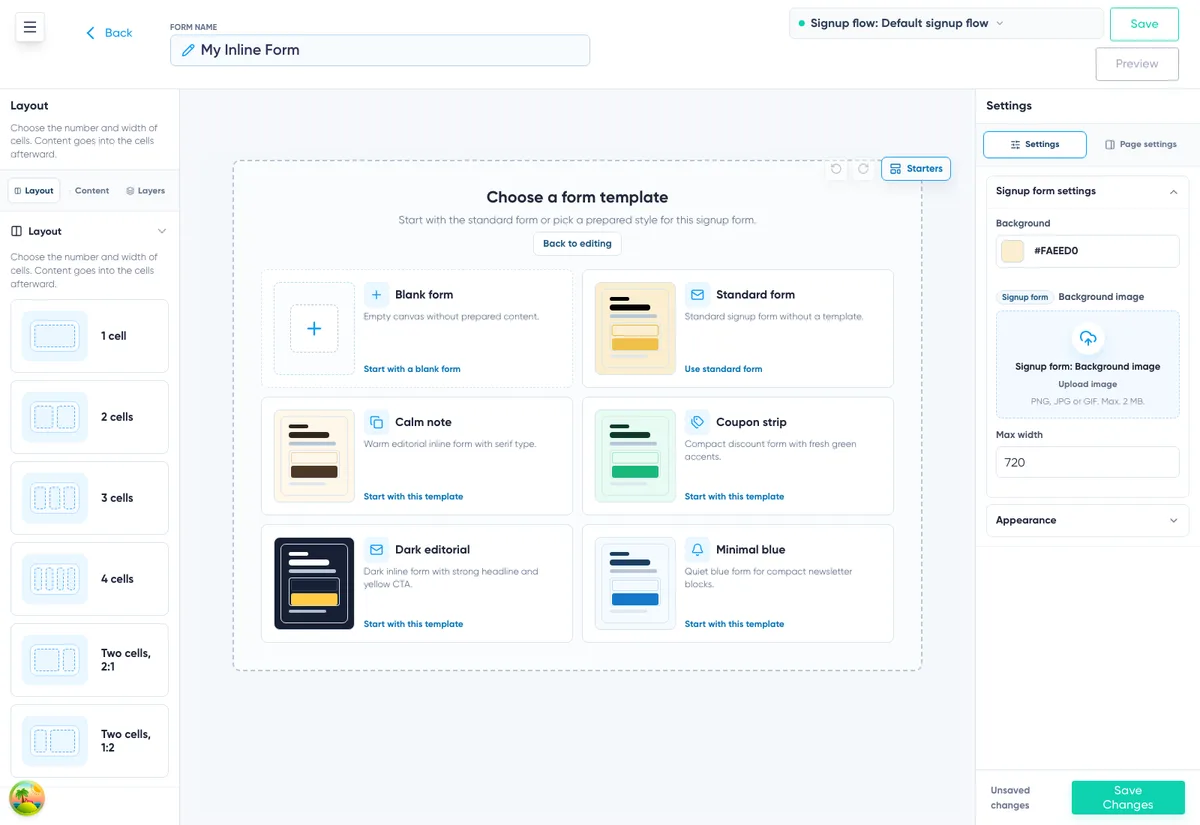
Choosing a Starter Design
Embedded Forms offer a blank form, a standard form, and four designed templates:
- Calm note
- Coupon strip
- Dark editorial
- Minimal blue
Choose the design that best matches the space and tone of the website where the form will appear. Every starter can be changed completely after selection.
Designing the Embedded Form
Use “Layout” and “Content” to arrange the form. An Embedded Form can contain the signup form together with supporting text, images, lists, buttons, social links, a subscriber counter, spacers, or dividers.
For a narrow sidebar or footer, a single-column design is usually easiest to read. In a wider page section, a two-column layout can place a short explanation or image next to the fields.
Select the signup form block to choose subscriber fields, required fields, labels, hidden tags, a progress indicator, and an optional subscriber counter. You can then style the form container, fields, and submit button separately.
Open “Page settings” to change the background and overall design defaults for the Embedded Form canvas. Keep the surrounding website in mind. A transparent or simple background often integrates more naturally, while a contrasting background helps the signup offer stand out.
The complete instructions for layouts, content, layers, fields, tags, typography, and appearance are in Using the Signup Form Builder.
Connecting the Signup Flow
Use the signup flow control in the builder header to review what happens after submission, which Double Opt-in email is sent, and what the visitor sees after confirmation.
You can select an existing flow, edit the assigned flow, or create a new one. If the selected flow is shared with other forms, remember that editing it can affect those forms too.
Previewing and Saving
Click “Preview” to review the complete form before placing it on your website. Check the field order, labels, error space, button text, and the amount of supporting content.
Click “Save changes” to store the current version. Return to the Signup Forms Overview when you are ready to embed it.
Activating the Form
The Embedded Form must be active before its public code can be used.
If the form is inactive, open its three-dot actions menu in the Signup Forms Overview and choose “Activate”. An active form shows the “Show Code Snippet” action.
Deactivate the form when it should no longer be available on your website. Deactivation takes the form offline without deleting its design or previous report data.

Copying the JavaScript Code
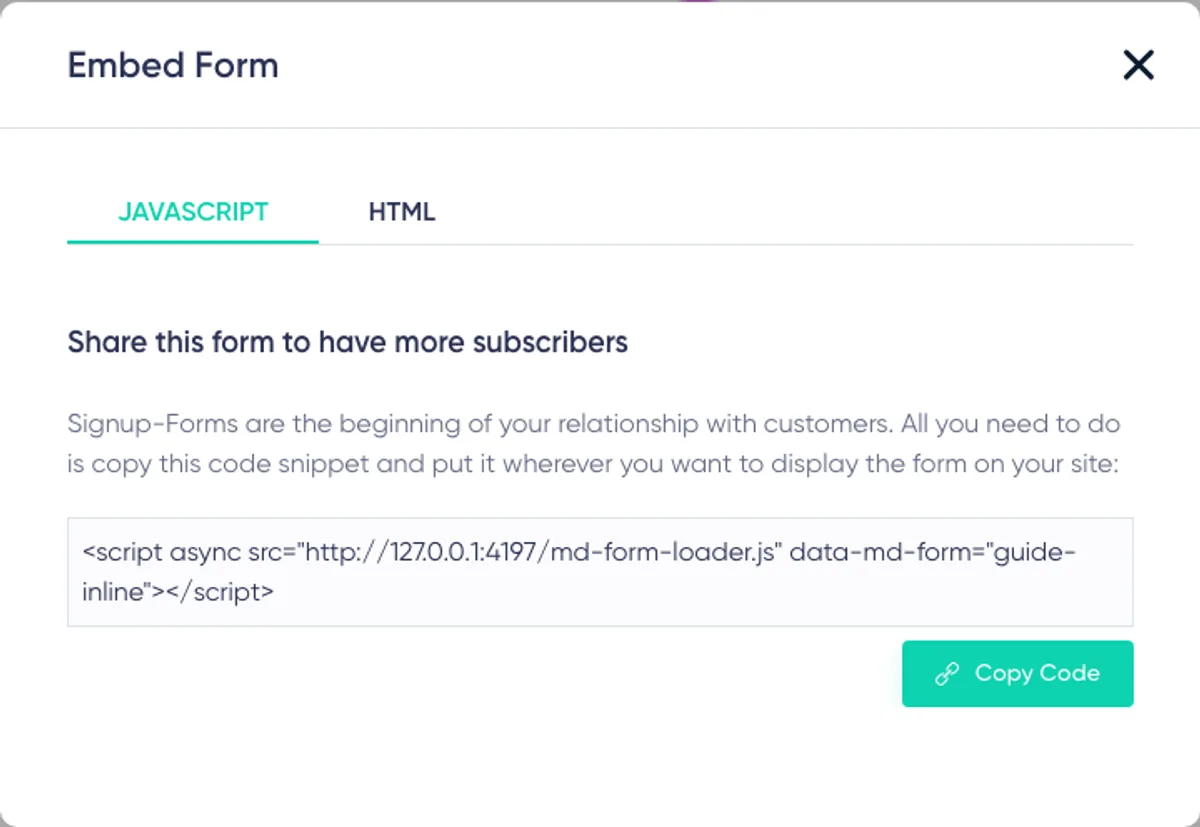
Click “Show Code Snippet” and open the “JavaScript” tab. Maildroppa provides a short script containing the unique form ID.
The code follows this structure:
<script async src="https://form.maildroppa.com/md-form-loader.js" data-md-form="[form-id]"></script>
Copy the complete code without changing the script address or form ID.
The JavaScript option loads the current saved form through the Maildroppa form runtime. When you later edit and save the same form in Maildroppa, the existing snippet still refers to that form ID. You do not need to create a new form simply to change its text or design.
Adding the Form to Your Website
Paste the script into the page location where the Embedded Form should appear.
The exact steps depend on your website system. In a page builder or content management system, use a block that accepts custom HTML or script code. In a custom website, add the script to the relevant template or page markup.
Some website editors remove script tags for security reasons. If the form does not appear after publishing the page, first check whether the editor preserved the complete Maildroppa script. You may need to use the system’s dedicated custom-code area or ask the person who manages the website.
Do not paste the same Embedded Form snippet several times on one page unless you intentionally want the same form in several locations and have tested that setup.
Using the HTML Tab
The “HTML” tab provides the generated form markup. This option is intended for custom implementations where you want to work directly with the rendered HTML.
Copy the complete markup if you choose this method. Because a custom HTML integration can be affected by your website styles and implementation, test its fields, validation, submission, and confirmation flow carefully.
For the normal Maildroppa-managed form, the JavaScript snippet is the shorter integration and loads the current public form configuration by its ID.
Testing the Embedded Form
Publish or preview the website page that contains the code. Then test the form as a visitor would:
- Check that the form appears in the correct position.
- View the page on a wide and a narrow screen.
- Complete every required field.
- Submit the form and review the response.
- Open the Double Opt-in email.
- Confirm the address and review the final response.
- Verify that the subscriber and any hidden tags appear correctly in Maildroppa.
If the form is wider than its website container, adjust the form width, column layout, padding, or mobile stack settings in the builder. Avoid fixing layout problems by changing the generated Maildroppa code.
Updating an Embedded Form
Open the same form in Maildroppa, make the changes, preview them, and click “Save changes”. The JavaScript snippet on your website continues to use the same form ID and loads the saved public configuration.
If the form should be removed temporarily, deactivate it from the Signup Forms Overview. If it is no longer needed, remove the snippet from the website as well so that the page does not contain unused code.
Ready to Send Better Emails?
Stop juggling bloated tools or overpriced plans. Maildroppa offers personal support, privacy-conscious controls, and powerful email marketing - starting free forever.
No credit card required. No time limit.